


Let’s see how to solve a particular problem, changing mother board and find no IDE connections, losing a hard drive with the boot sector, partition of /boot, and the CD–DVDs, but trying to keep the other hard disks and the system as it was.
Boot system with external USB case
Find these connections is very hard: the IDE disk is packing rather go to an aluminum case with USB connection.
Some people say that you can not boot from an external USB disk is not allways true. The only problem I’ve found is that is not stored in the BIOS, but you can access the BIOS and search to do a full boot of the USB devices then the disc appears. It’s important to choose the one that comes with the name of the device only because the other one that it comes with UEFI prefix will not start.
Doing that the system starts from partition on the old disk because it has the UUID (identifier partitions). It does not change even if it is moved from site either /dev/sda, for example.
Well once we booted the system is the issue of getting everything to work as before with the remaining disks, without ever having to enter the BIOS.
Trastaling system
I always try to have the important directories in separate partitions when installing for the first time to retain these partitions in case of full installation, but not always.
The problem is that one of the disk partitions is /boot
It is easy although you have cold blood and backup important data.
The first is to see the partitions. For that I used gparted that works very well.
Otherwise I have installed on debian systems use type:
sudo apt-get install gparted
then begins with
sudo gparted
When starting starts a window where you can see all disks with partitions:
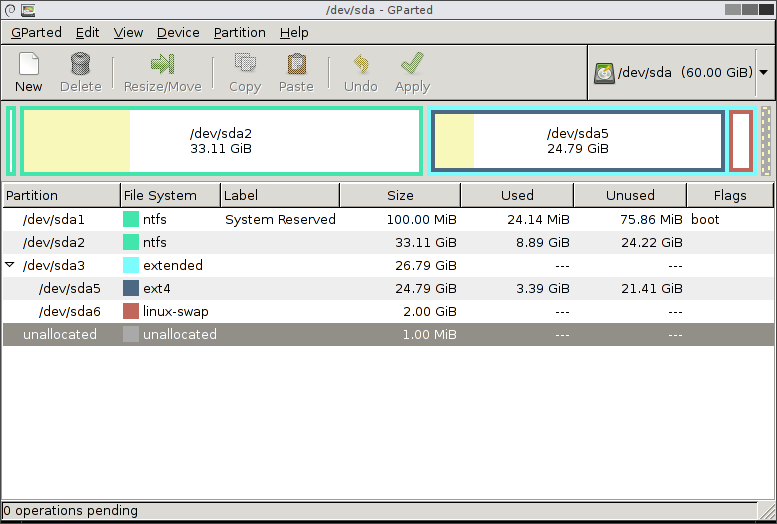
Creating new partitions
Blank colored, within each partition, is the space left free. We seek a partition that has enough free space for the boot partition and that is not no system to give problems (or /var, or / and stuff just in case), a data or windows would be nice. It just strikes you on the right mouse button and a menu for that partition, choose to “resize/move” to make room for a partition size that you are moving (you can tell him directly to let the gap behind appears) and you create a new one in the hollow of the type to be (ext4) and is given the label “boot” to recognize.
Copying data to new partitions
All jobs are added at the bottom of the GParted window and when you have it all press “apply all” and that’s it.Now you can mount this new partition, you can from the gparted own, and copy everything from the old partition to the new:
sudo cp -afv /boot /* /media/user/ _boot
Be carefull with the “/” at the end because we don’t want to create a boot directory within it 😉
Now instead of the name of the partition type before /dev/sdaX (SATA, SCSI) or /dev/hdaX (IDE), now UUID that are an identifying code for each partition on the disk and has been very well used prior to boot the system.
Fixing fstab (system distribution)
To find the UUID for each old and new unit use:
ls -l /dev/disk/by-uuid/
To find out what is being used in the system using the “system monitor” that comes with Ubuntu by default. At the “File Systems” tab you can see which partitions are in use and which corresponds each.
The following is going to change the partition to be used as /boot from now, using your favorite editor
sudo vi /etc/fstab
That changed the old UUID for the new and out.
To install grub on the new drive (in this case /dev/sda) simply:
sudo grub-install /dev/sda
but the problem is that an old boot will try to access the old disk to find the kernel (/ boot / …) will be installed. If /boot were not in the record we’ve removed that would be enough.
In this case it would have to do is restart the gparted as before and when you press the right button mouse on the new partition we get a section “mount” and in “boot” so that pressing riding boot partition as new and the old is removed.
Fixing grub
Now we change grub to point to the new partition:
sudo dpkg-reconfigure grub-pc
Hence we get a window with the boot options then go to the next and we get the partitions that have mounted to choose the one with boot. Choose the new and still accept and keeps out all right. We can enter and search /boot/grub/grub.cfg old chain and the new UUID to see what has changed.
Finally install grub on the boot disk from now:
sudo grub-install /dev/sda
And we’ll restart everything running as if nothing had happened, except that the computer lacking the drive and the DVD …
I hope you serve.
Greetings to all.